سفارش تبلیغ
صبا ویژن

Does Clearing Instagram Cache Delete Messages Find Out Here!
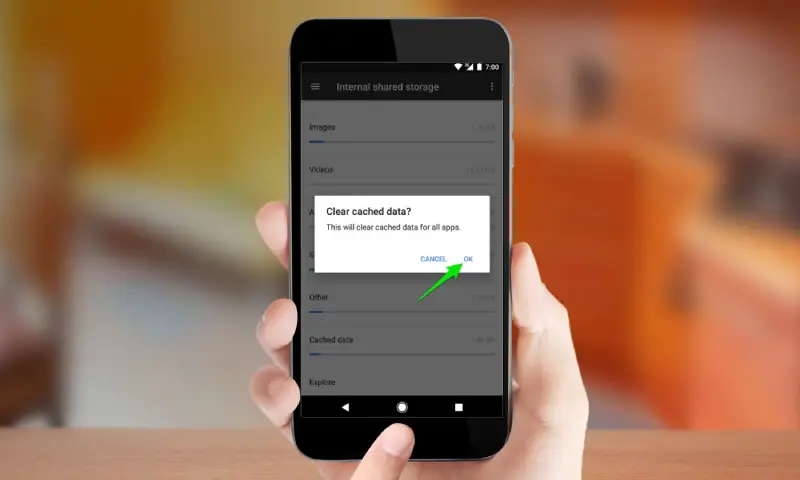
Instagram is a social network containing photos and videos. In order to increase the efficiency of the application and prevent reloading, the cache stores information in itself, so every time you open the application, the displayed images are stored in the Instagram cache. This work leads to a reduction in internet usage, but after a long time, the cache memory is full and needs to free up space to store other information.
Clear the cache on Instagram Android
Have you ever wondered why some Instagram images are displayed when you are offline? Does Instagram have a cache? The answer is yes. As mentioned, Instagram, like other programs, has a cache memory. If you have been using Instagram for a long time, a large amount of your Instagram cache memory has been occupied, and this will lead to the slowness of the Instagram application. Therefore, you need to clear Instagram cache. But the question that arises is what exactly is meant by cache memory and what does it do?
What is Instagram cache?
Different posted images are saved by Instagram cache. In fact, by saving these images once, the cache prevents them from being reloaded. In addition to saving internet usage, this will increase the loading speed of the same images and videos next time.
1- Delete Instagram cache through phone settings
If you are among the users of Android phones, follow the steps below to delete the Instagram cache on Android through the settings of your mobile phone:
Go to the settings of your mobile phone.
Select Applications option from the settings section.
In the next step, touch Applications Manager.
Now select the Instagram app from the list of displayed apps.
On the screen that appears, touch the storage option to view the amount of space used by Instagram.
Now you will see two buttons on the displayed screen.
CLEAR DATA: clear data
CLEAR CACHE: clear the Instagram cache
You can see the amount of cache occupied by Instagram above these options.
Select the CLEAR CACHE option to delete the Instagram cache.
After doing this, your Instagram cache memory space will be freed and the amount of cache memory will be reduced to 0B. By clearing the cache memory, you will feel its effect and increase the speed.
2- Uninstall the Instagram application
Deleting the Instagram application and reinstalling it is one of the quick and easy ways to clear the Instagram cache. By uninstalling Instagram, the cache memory of Instagram will be completely deleted and after reinstalling all your information will be returned.
The first method:
On the phone screen, hold your finger on the Instagram app icon.
After seeing the Uninstall option at the top of the screen, touch it.
After deleting the program, download and install it again from Google Play.
The second method:
Go to your phone"s settings.
Select the Applications option.
Next, touch Applications Manager.
Select Instagram.
Tap MORE from the top of the screen and tap Uninstall.
After deleting the Instagram application, download it from Google Play and install it again.
3- Deleting search history on Instagram
Clearing the search history on Instagram is another way to clear part of the cache memory. The steps to delete Instagram search history are as follows:
Open the Instagram app and go to the Instagram settings section by touching the menu button.
Now go to the Security menu.
In order to clear the search history on Instagram and delete part of the cache, select the Search History option at the bottom of the page that appears.
You will now see a list of your past searches. Select the blue Clear All option at the top of the page.
A message appears and states that if you delete the search history, all the accounts and hashtags shown in the search results will be deleted and it is not possible to return them. In order to delete the search history, select the Clear All option again.
By doing this, part of your Instagram cache will be cleared and its space will be freed.
Why Instagram Notes Are Not Showing After Update

Instagram is one of the most popular and widely used social networks in the world, which is constantly updated with new functions and features to improve the experience of its users. One of the latest news that Instagram has included is Notes, a way to share short and fleeting messages with your followers or best friends.
However, many users have encountered the problem that Instagram notes do not appear in their application and are wondering why and how to fix it.
What are Instagram notes?
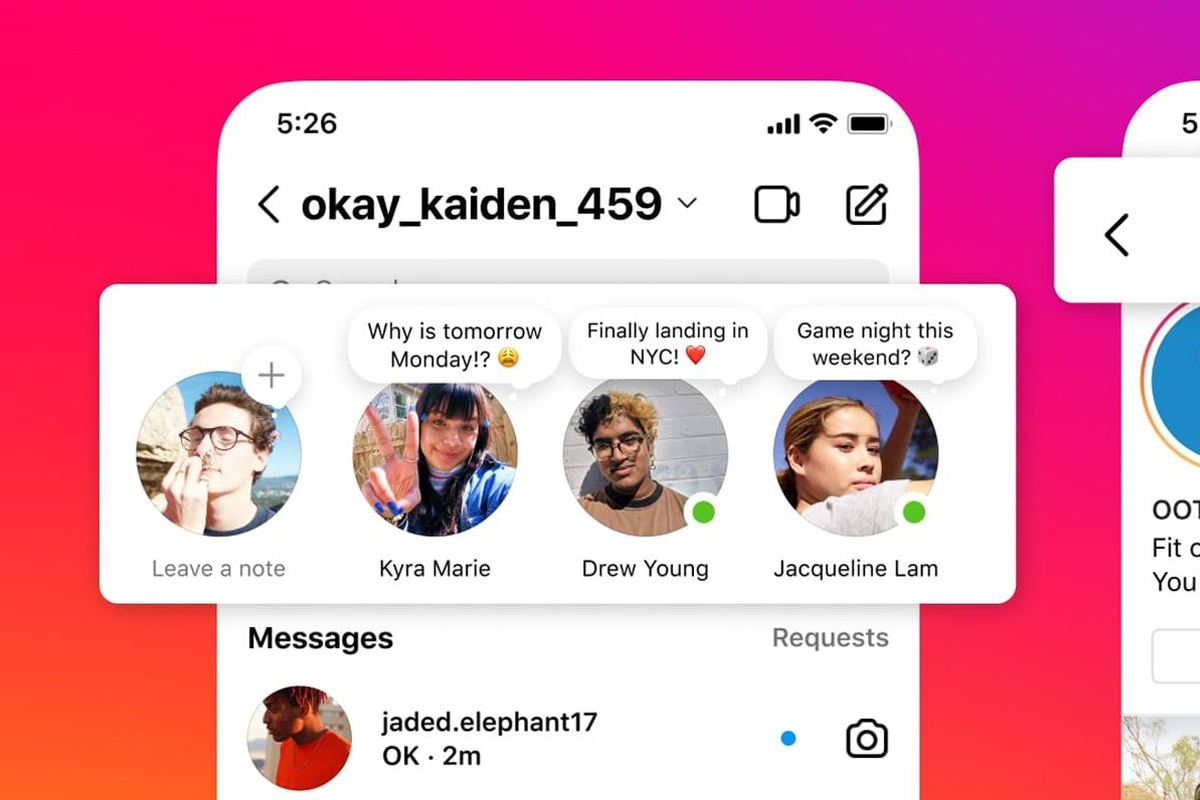
Instagram notes is a new feature that allows you to send text messages of 60 characters that will disappear after 24 hours. These messages will be displayed above the direct message box and you can choose whether you want All your followers or just your best friends can see them. Instagram notes are a way to express your mood, opinion or humor and also to start a conversation with your contacts. Also, you can personalize your notes with different colors and fonts
This feature was released on December 13, 2022 and is a way to compete with other platforms such as Twitter or Snapchat, which also offer the possibility of sharing short and ephemeral messages. Instagram Notes seeks to encourage interaction and closeness among users, as well as giving them more options to express themselves on the social network.
Why am I not receiving Instagram notes?
If you don"t receive Instagram notes in your app, it could be for various reasons. The first and most likely is that your app is not updated to the latest available version. Instagram Notes was released on 13 December 2022 and you need to have installed version 222.0 or higher of the app so if you have an older version, notes may not appear.
Another possible reason why your scores are not coming out on Instagram is that this function is gradually being implemented in different countries and regions and may not have reached you yet. According to the official website of Meta, the company that owns Instagram, these notes are being implemented in the United States, Argentina and some European countries, but it is not clear when it will be available to all users.
It may also happen that your device is not compatible with this function, or that you have a technical or connection problem that prevents the notes from coming out. In this case, you can restart your device, clear the app"s cache and data, or uninstall and reinstall the app. If none of these work, you may have to wait until the issue is resolved or a new update is released.
How to fix the problem
If you want to solve the problem that Instagram notes, there are a few things you can do to enable them. these are:
Update your app to the latest version. To do this, go to Google Play or the App Store, depending on whether you have an Android or iPhone, and search for the Instagram app. If you see that an update is available, click the Update button and wait for the process to complete.
Reboot your phone Sometimes a simple reboot can fix some technical problems or temporary errors Turn off your phone and turn it on again after a few seconds. Then, open the Instagram app and see if you get the notes.
Use a VPN to change your location. If you think the problem is that the notes haven"t arrived in your country or region yet, you can use a VPN to connect to the Internet from another location where they are available. A vpn is a program that allows you to change your IP address and pretend that you are on another site. You can download a free VPN from Google Play or the App Store and choose a country like the United States or Argentina to connect to. Then, open the Instagram app and see if the notes appear.
If none of the above works, you may need to contact Instagram Customer Support or Technical Services to report the issue and request assistance. You can do this from the app itself and go to Settings > Help > Report a problem. You can also check the FAQ or official forums to see if other users have the same problem and how they solved it.
What are the benefits of Instagram notes?
Instagram Notes is a quick, simple, and fun way to communicate that lets you share your thoughts, feelings, or ideas with your followers or best friends. Some of the advantages that Instagram notes have are:
It allows you to express yourself with more freedom and creativity, because you can customize your notes with different colors and fonts and use emojis, hashtags or mentions.
They help you generate more engagement and loyalty with your audience, as you can start conversations, answer questions, ask for feedback or participate in surveys.
Give you more visibility and reach, since your notes are displayed above the direct message box and can attract the attention of your followers or potential followers.

Are Instagram Video Calls Recorded The Truth Revealed

Instagram is one of the most popular social networks in the Android operating system, which has many features. One of these features is the ability to make a video call, which works very well in this field. Ability to record these calls? It is not set to this program by default.
How to record and save a video conversation on Instagram for Android and iPhone
How to Record Instagram Video Call
First of all, note that you can record WhatsApp calls in addition to Instagram. To record an Instagram video call on Android, it is necessary to install an app. Android does not have this feature by default. However, some manufacturers natively provide the ability to record the screen of your Android smartphone. This feature is especially true for Huawei smartphones. If you don"t have such a screen recording button, you need to download an app. You can also download Insta videos and stories.
Save Instagram video call through MNML Screen Recorder app
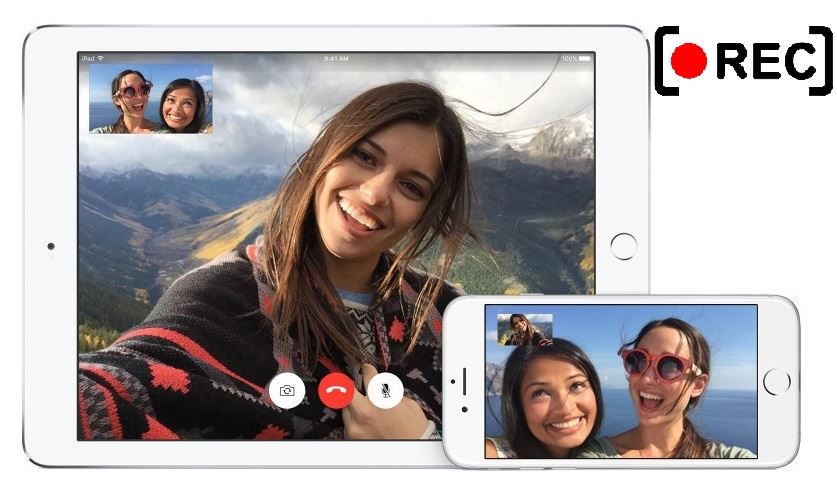
Is Instagram video call saved? In fact, there is no Instagram video call recording program and you have to use screen recording software to record video calls.
To do this, follow the steps below:
First, download the MNML Screen Recorder software.
Then open it and tap on the three dots at the top-right and select Settings.
Go to the Recording section and enable Record Audio.
Go back to the program menu and click on Record at the bottom right. A timer or counter will start three seconds before screen recording and a warning message will appear indicating that the program will record everything that is displayed on the phone screen. Confirm and the recording will start.
Please confirm if the app asks for permissions.
Then enter Insta and make a video call with the contact you want.
After the conversation is over, tap the stop button (square shape) accessible from the notification bar. Or open the MNML program and click Stop on the bottom right.
Back to MNML Instagram video call saver app. Your Instagram video conversation will be displayed. You can view it on your phone and share it with your friends.
Save Instagram video chat through AZ Screen Recorder app
How to record an Instagram video call? You should use screen recording applications for this. Recently, the ability to record sound along with screen recording has been limited in many programs and is not possible.
Various programs were released for this task, but in recent updates, this feature was removed from them.
Currently, there are only limited versions of these programs that have this feature. One of these programs is version 3.9 of the AZ Screen Recorder application, which you can download.
In addition to this program, there are other screen recording programs that you can check out.
Save Instagram video conversation via Mobizen Screen Recorder
To record an Insta video call, first install the Mobizan Screen Recorder software.
Once the app is downloaded, open it.
The first time you launch the app, you"ll be shown a quick tutorial. It will then display a floating icon on the screen so you can view the options. With the app active, this icon will be readily available for you to use when recording your screen.
Now open Instagram.
Make a video call with anyone you want.
Then tap on the app icon.
Select the camera to record the screen.
At the end of the conversation, tap on the square mark to end the recording process.
If you want to record regular calls, this is also possible for you.

How to post a video on Instagram without it being a Reel A 2023

There are four general methods of sending videos on Instagram, which are Feed video, Story video, Live video and IGTV video, each of which is used for different situations. Each of these types of video submissions has its own conditions and time limits.
Time limit of video types on Instagram
As we said, the time limit of a video on Instagram depends on the type of posting of that video. The length of each video on Instagram is as follows:
Normal post video length: 3 seconds to one minute
Length of story videos: up to 15 seconds
Length of live videos: up to one hour
Length of IGTV videos: 15 seconds to 10 minutes
Instagram feed videos
Feed videos are the normal videos that you send in the majority of posts on Instagram and appear on the main page of your Instagram profile. The length of these videos is from 3 seconds to one minute. It means that you cannot send videos that are less than 3 seconds or more than one minute in this way.
However, Instagram allows you to choose a video that is longer than one minute and choose and post one minute of that video as you wish.
1. First run the Instagram program and select the + icon from the bottom of the screen.
2. Then select your desired video from the camera roll section and click Next from the top of the screen.
3. On the next page, you will be provided with options to edit the video. You can apply a suitable filter on the video using the filter option. Select the Trim option to select the desired part of the video.
4. Now select the desired part of the video by moving the start and end switch at the bottom of the screen and finally tap on the Done option.
Instagram IGTV videos
IGTV is a relatively new feature on Instagram that allows you to post videos longer than a minute. The time limit for IGTV videos is from 15 seconds to 10 minutes, although popular accounts registered with many followers increase this time limit to one hour. To send an IGTV video, proceed as follows:
1. First run the Instagram program and select the magnifying glass icon from the bottom of the screen.
2. Select the IGTV option from the top of the page.
3. Tap the + icon from the top corner of the screen.
4. Now select the desired video from your phone gallery and send it.
Send multiple clips in one post
A very simple way to post videos longer than one minute on Instagram is to use multiple posts. As we said, there is a one-minute time limit for sending videos in the normal way, but you can bypass this limit by splitting your video and sending several clips in one post. Instagram allows you to post 10 photos or clips under one minute in one post. So if you have a video longer than a minute, you can use video editing programs to split it into shorter clips (under a minute) and upload them to a post. To send multiple posts:
1. First run the Instagram program and select the + icon from the bottom of the screen.
2. Select the SELECT MULTIPLE option.
3. Now select the clips you want and send them.

Why Does Instagram Change the Color of My Reel

If you’re an avid Instagram user, you may have encountered a frustrating issue with your reels. After spending time and effort creating the perfect video, you upload it to Instagram, only to find that the colors have changed. Your once vibrant and well-edited reel now appears oversaturated, overexposed, or even dark. This phenomenon has left many users scratching their heads and searching for answers.
The first step in addressing this problem is to understand why it occurs. Based on user experiences and discussions in online communities, several possible explanations exist for the color changes in Instagram reels.
One common theory is that Instagram’s compression algorithm may alter the colors during uploading.
Another theory suggests that the issue could be related to the specific filters or editing tools used within the Instagram app.
To gain further insights, let’s take a closer look at what users have shared in various online forums and communities.
In an Adobe Support Community thread, users reported experiencing color changes in videos uploaded to Instagram. One user mentioned that their video color changed noticeably when uploaded from Adobe Premiere Pro to Instagram. Another user pointed out that the issue seemed specific to certain colors, particularly greens, which appeared brighter and different from the original. These experiences indicate that the problem may not be limited to a particular editing software but could be related to Instagram’s handling of colors.
One user in the Adobe Support Community suggested that the color changes may be influenced by the viewing conditions. They advised using a dedicated I/O device, such as AJA Kona or Blackmagic Intensity, to ensure the best quality display. By calibrating your display to a color standard, you can have more control over how your reel appears on that specific device.
Another user recommended importing the reel back into Adobe Premiere Pro to check if the colors look accurate. If the colors appear as intended within the editing software, it suggests that the issue lies with Instagram rather than your video file.
Some users on Reddit have reported that color changes occur primarily when using the “normal” filter within Instagram. To work around this issue, consider experimenting with different filters and editing tools provided by the platform.
Based on user experiences, certain colors, especially greens, seem to be more susceptible to changes when uploaded to Instagram. If you frequently use these colors in your reels, you may want to consider adjusting your editing techniques or exploring alternative color choices to avoid the issue altogether.
To ensure the best possible outcome when uploading reels to Instagram, it’s essential to optimize your editing workflow. This includes maintaining a consistent color profile throughout your editing process, using calibrated displays, and exporting your videos in formats compatible with Instagram’s requirements. By adhering to these best practices, you can minimize the chances of color changes occurring during the upload process.